
 |
| This is not the kind of vintage we're going for. |
I was wondering what could I give you that you could regift and then it hit me, a tutorial! I took pics and am going to try to break down the making of the dress shirt aprons. They're so super easy and they're so super cheap (if you get your dress shirts second hand) What a better way to show someone you care with out spending a lot of money (Christmas isn't about how much we spend after all) then to give them a super cute stylish apron. And aprons are so vintage chic right now.
1. (I forgot to take a photo of this step, sorry) This step is probably the most time consuming and I suggest you do it while sitting on the couch watching the t.v. Take a seam ripper and remove the stitches holding on the collar and shirt pocket thereby removing them from the body of the shirt. (They'll become the waist and apron pocket later on).
2. (Again no photo, man what is up with that) cut close to but be careful not to cut through the seam on either side of the shirt (cut on the outside and that way you won't have to hem the side of the apron!). Then cut across the body of the apron from just under the arm holes, making a rectangle.

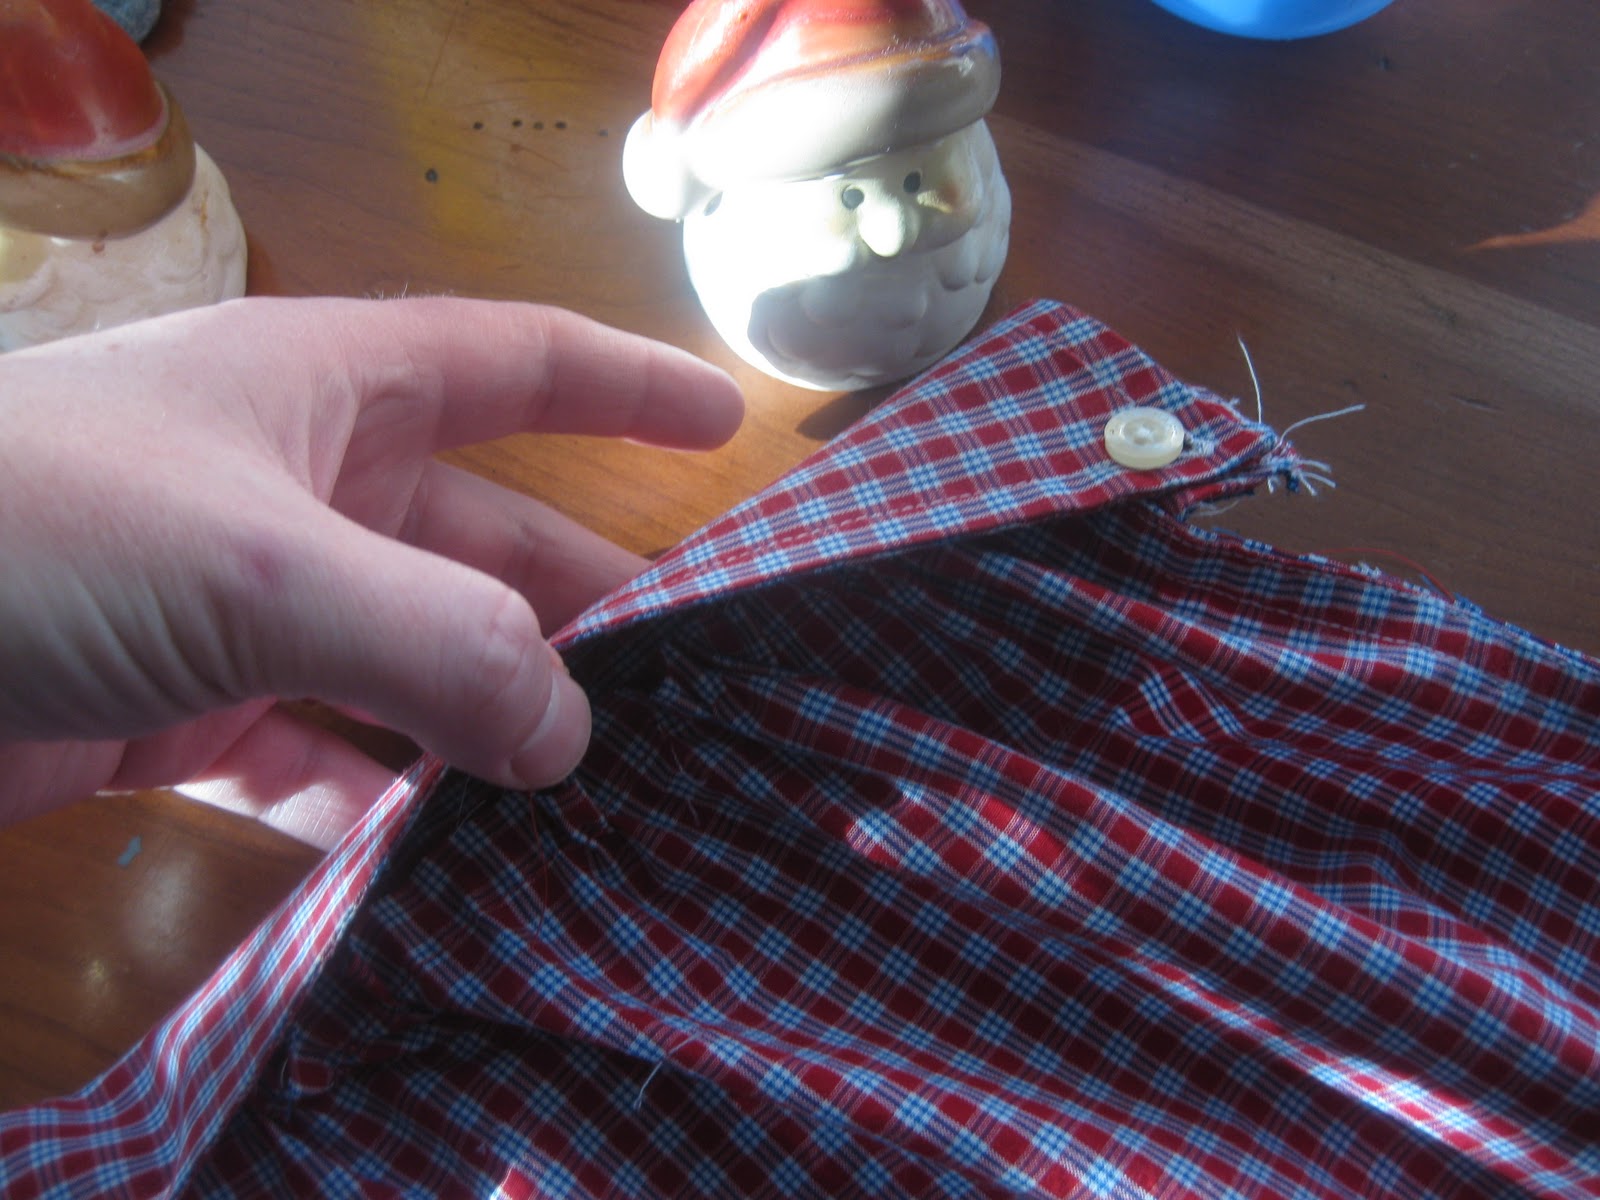
3. Now the fun begins. Make sure the shirt is buttoned properly and using a matching or coordinating thread stitch up both sides of the button placket. (Is placket the right term?)

Be careful not to catch a wrinkle in the shirt or you'll have to use your seam ripper! GRRRR!

4. Turn your machine to it's longest straight stitch. On mine it's "3" and stitch across the top of the apron.

5. Let's install the pocket before we gather the body of the apron. Take the pocket you removed last night while you were watching episodes of "Grimm" and pin it on the apron about 3 inches in and about 6 inches down.

Make sure your machine is back on it's smallest straight stitch and stitch around the pocket close to it's edge and leaving the top open. If your shirt doesn't have a pocket you can cut a square from the scrap of the shirt or use something else (I used an old hankie on a couple of mine. You can find them at junk shops for a song.)

6. Lay your collar piece flat on your work surface and lay the body of your apron down below it. Now pull the threads at the top of your apron to "gather" the body until it is the same width or a bit smaller then the collar piece (the collar is now the waist band.)
7. Sandwich the body of the apron in the collar/waist band and pin in place.

8. Take the back of your shirt and cut two pieces about 30 inches long and about 6 inches wide. These will be the waist ties and you can make them as long and as wide as you want depending on how much shirt as you have, it's not critical.

9. Turn the side of your tie up 1/4 inch and iron. Then fold it 1/4 inch again and iron (do this on both long sides). If you cut your ties at the bottom you won't need to hem that end because that end was already the hemmed bottom of the shirt.
10. Sew your hem into the waist ties.
11. Put your machine on it's longest stitch and sew across the raw edge of both ties (so you can gather them).

12. Gather the waist tie and insert it into the end of the waist band. Sew down the end of the waist band to secure.
13. Sew along the bottom of the waist band thereby attaching the waist and body.

You can "sign" your work if you want.

14. Voila you have an apron in less then 14 steps. It actually looks like a lot but it's not it's so easy and a great starter project if your interested in trying out the sewing thing with little to no cost.
This might not make as much sense as I think it does. If you have ANY questions about this leave a comment or find me on face book and I will try to make it more clear. I hope it inspires you to try something handmade any way.
Also, I'm doing another give-a-way. On December 12th there is blogosphere giveaway day for the sewing type blogs. Cool huh? So, on December 12 make sure you check back to find out how to enter to win a gift package from me that will include an apron. I hope you're all enjoying the holiday season.
3 comments:
That apron is just too stink'n cute!
Okay I agree with Court and I would never be able to do this but if you ever need to get your cousin Jammi anything she would like one of these!!! :) Love reading your blog and keeping up with what you are doing.
Thank you both. And I promise if you have a sewing machine you could totally make one, they're the perfect starter project.
Post a Comment